
How to Register a Business Name in Kenya Step by Step
In this step-by-step tutorial, you will learn how to register a business name online through the updated eCitizen Business Registration Service (BRS) portal. If you encounter problems, just contact us.
Step-by-Step Business Name Registration Guide
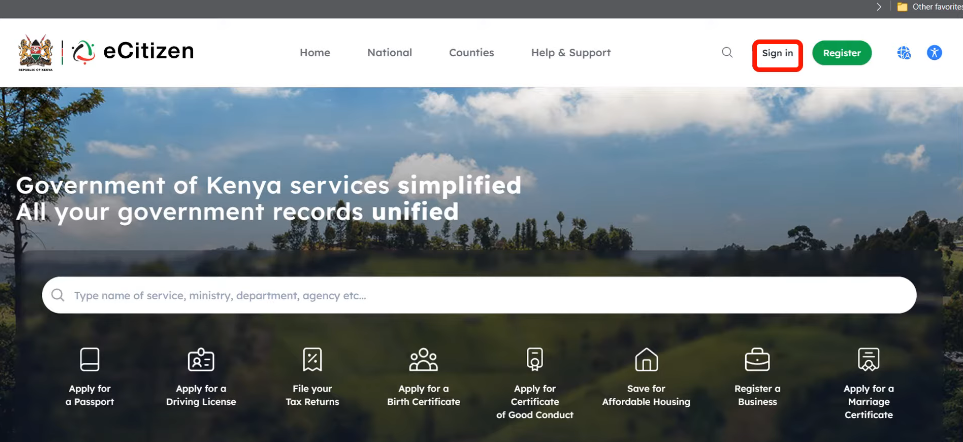
Step 1: Go to the eCitizen portal and click “Sign In.” Use your email address or ID number and your password to log in. A one-time password (OTP) code is sent to your registered phone number for security. Type it and log in.
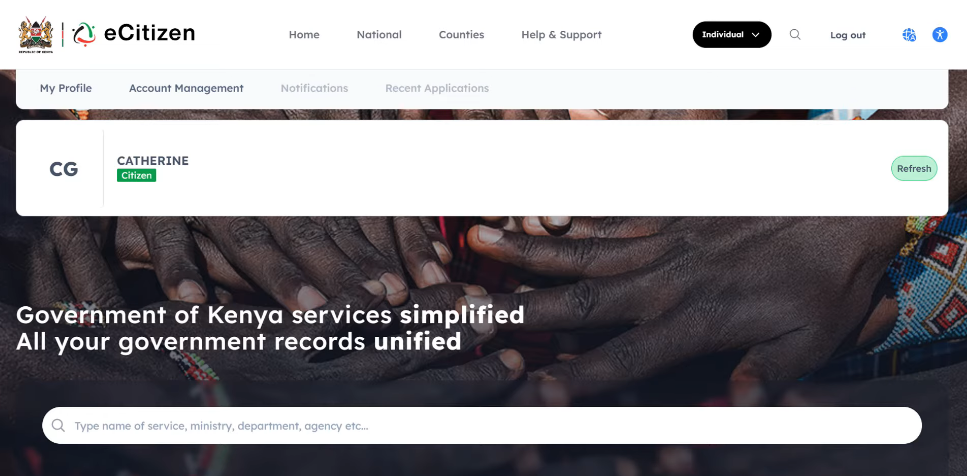
In case you do not remember your eCitizen password, click “forgot password” for a reset option. A code will be sent to your eCitizen registered number. Enter the code and change the password. Below is the logged-in page.
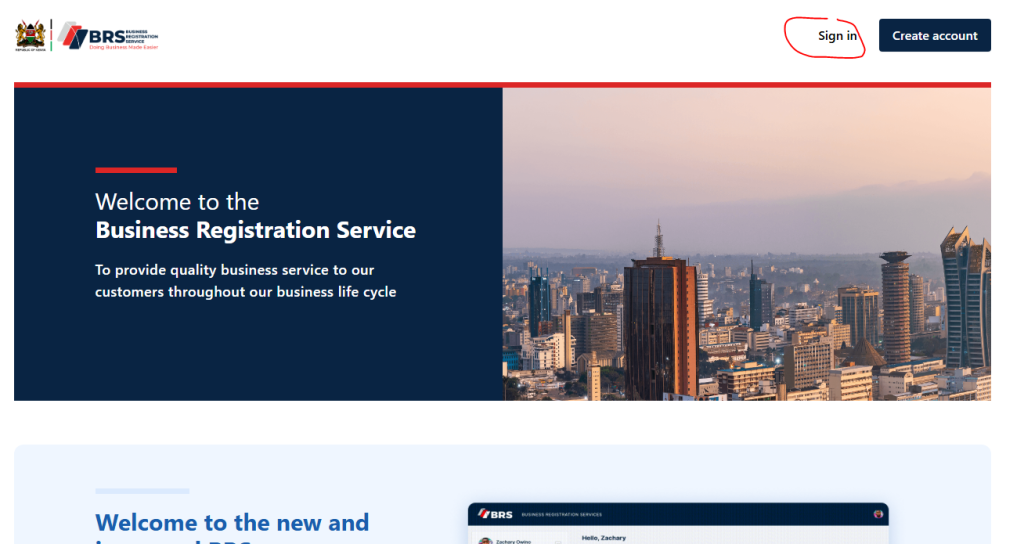
Step 2: Scroll through the available government services. Locate Business Registration Services (BRS), then click the icon. You will be taken to the official BRS Portal.
Step 3: Click “Sign in” on the top right. The system will request you to log in with the eCitizen account earlier logged in with. If all details are correct: Click Continue. This verification step helps prevent unauthorized applications.
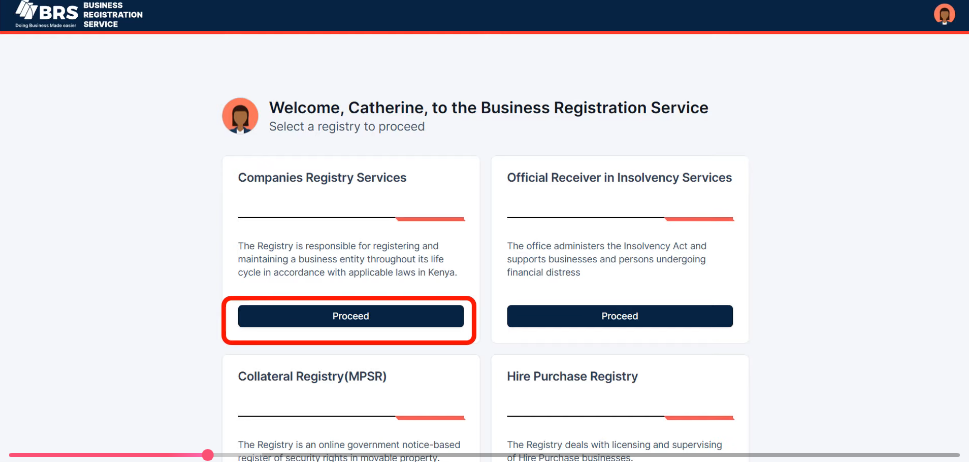
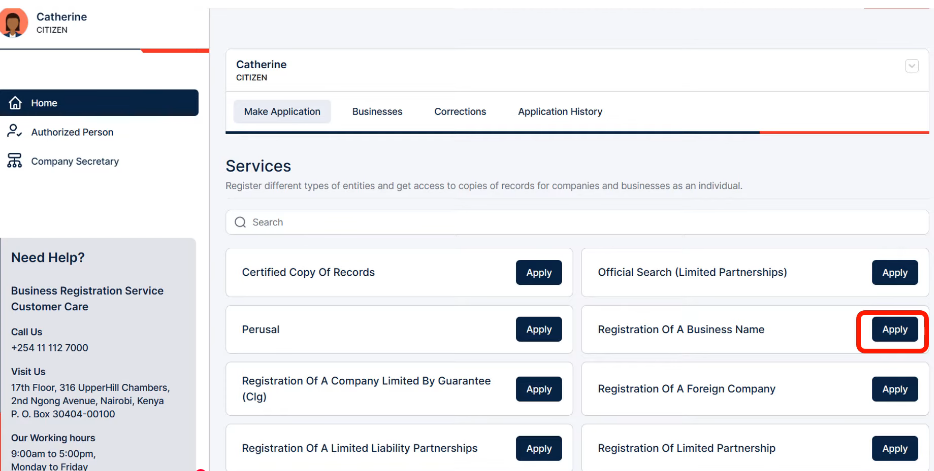
Step 4: Choose Registration of a Business Name
Choose the company registry service, then choose to proceed. It will open a new portal for business registration services.
Under registration of a business name, choose to apply. To start the registry.
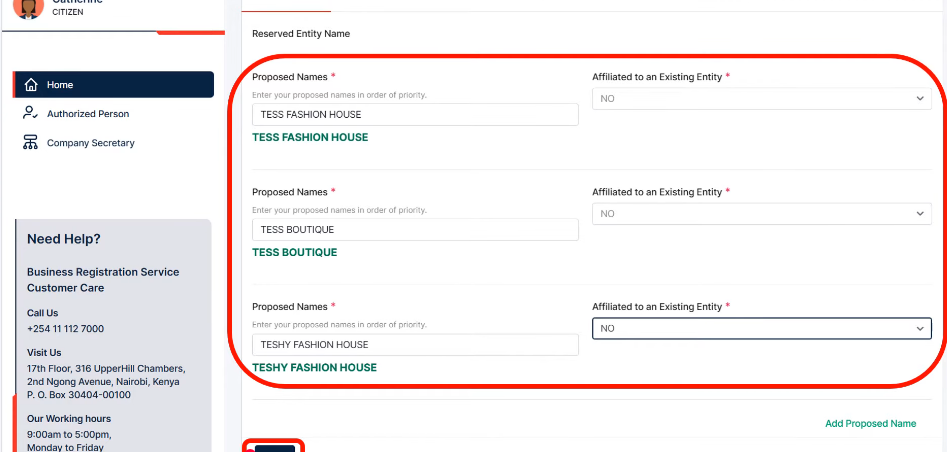
Step 5: Enter Your Proposed Business Names
Provide at least three proposed business names, with your first choice listed first as the preferred name. Choose names that are unique, simple, relevant to your business, and do not contain restricted government terms without approval.
You must also indicate whether the business is affiliated with an existing registered entity. Select No if it is independent and Yes if it is linked to another registered organization. Click next.
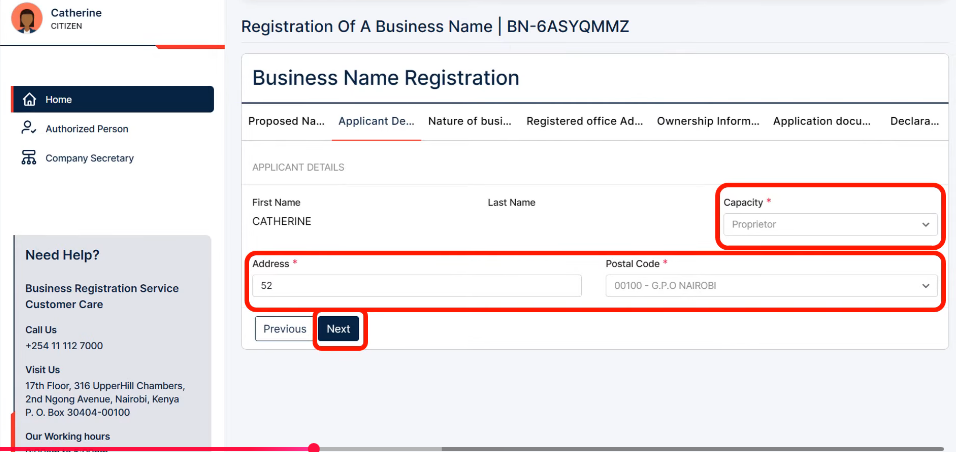
Step 6: Fill in the Applicant’s Information
Enter the applicant’s details, whether you are the business owner or an authorized representative. Provide your role, postal address, postal code, and contact information. Ensure all details match your official documents to avoid delays or rejection. Once completed, click Next
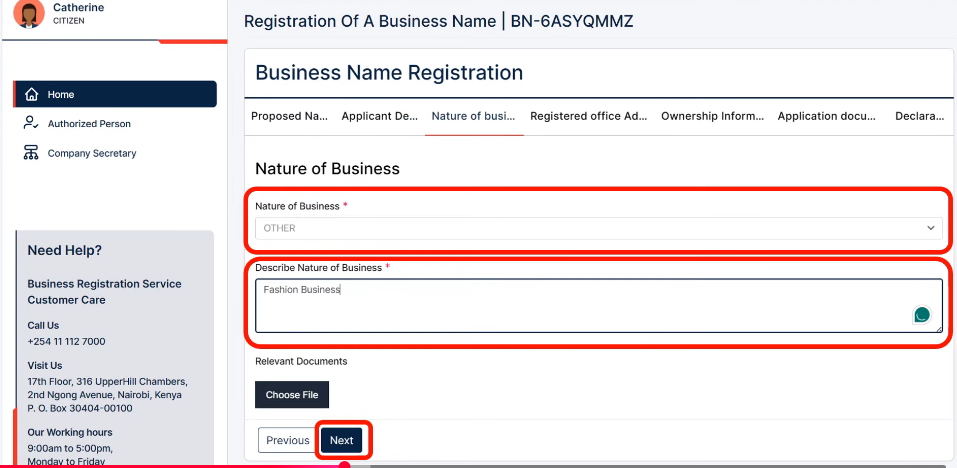
Step 7: Enter the nature of your business. Select the category that best describes your business, such as retail, wholesale, consulting, IT, or education. If your activity is not listed, choose Other and provide a clear description.
Some regulated industries may require supporting documents, such as approvals or registration certificates. Choose your business activity carefully, as it affects future licensing requirements. Once complete, click Next.
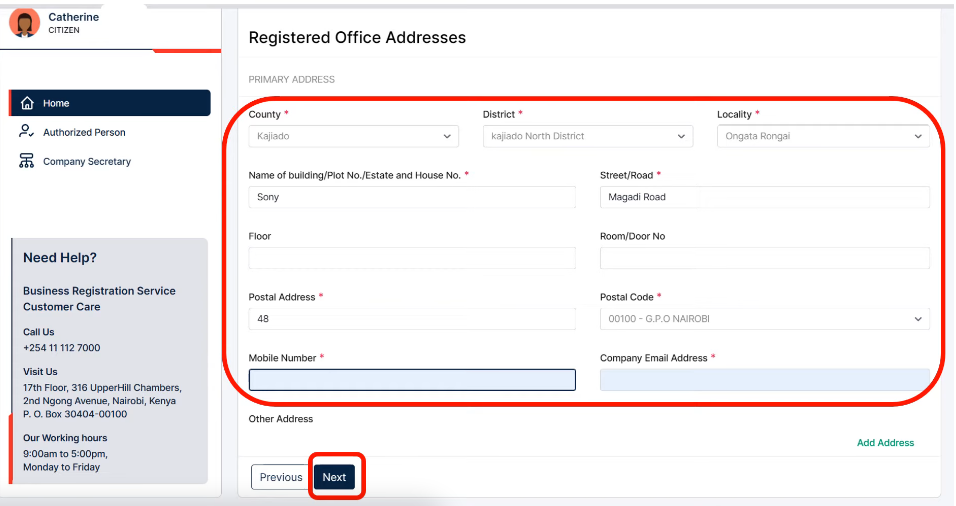
Step 8: Enter the Registered Office Address
Every registered business in Kenya must have a physical address. The registered office address is where official communications can be delivered. You may be asked to provide the county, sub-county, town, building name, street name, plot number, and postal address.
Make sure to use accurate information and avoid incomplete addresses. Ensure details match your actual operating location. Most fields marked with an asterisk (*) are mandatory. Double-check spelling and numbering. Wrong details will delay your approval.
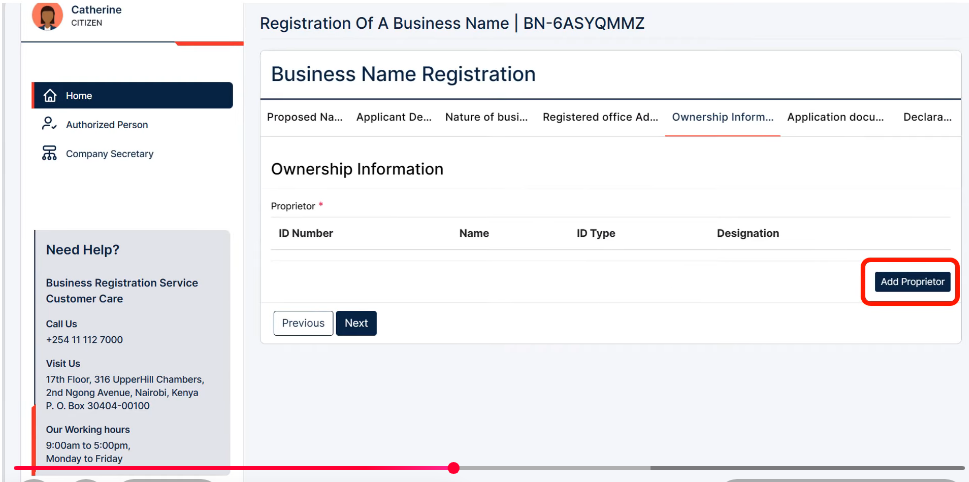
Step 9: Add owner/Proprietor Information
Click Add Proprietor and select the appropriate category (e.g., Kenyan Citizen, Foreigner, Local Company, or Other Legal Person). Most sole proprietorship applicants will choose Kenyan citizen.
Enter the proprietor’s ID number and first name, then click Search. The system will automatically retrieve and populate details such as name, gender, nationality, and KRA PIN. Verify that the information is correct.
Upload a recent passport photo and provide contact details, including phone number, email address, and physical address. Complete all required fields, then click Save to proceed.
Step 10: Download and Sign the BN2 Form
Download the automatically generated BN2 Form and review all details carefully. If everything is correct, sign the form in the appropriate section.
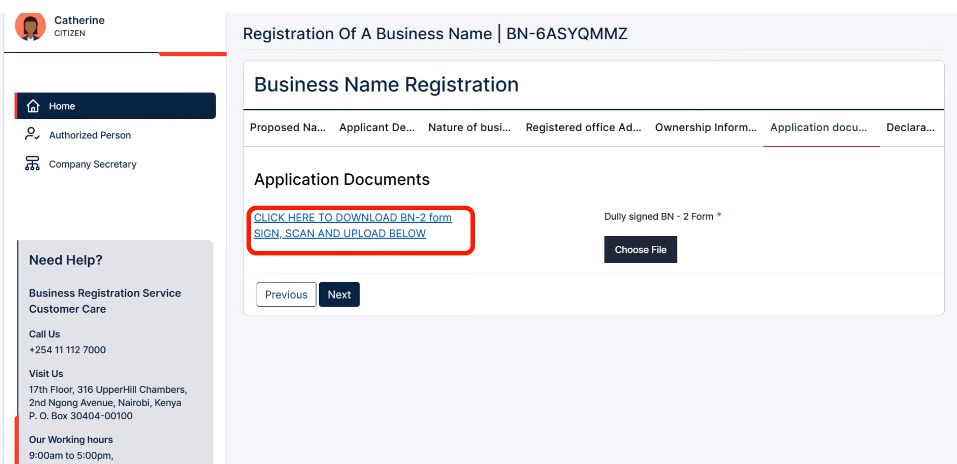
The Statutory Declaration is only required if there are multiple proprietors or a proprietor is unavailable to sign. Sole proprietors should sign only in the standard signature section. Scan the signed form, save it as a PDF, upload it to the portal, and click Next.

Toggle the declaration check mark, declaring you have provided all information correctly and as required.
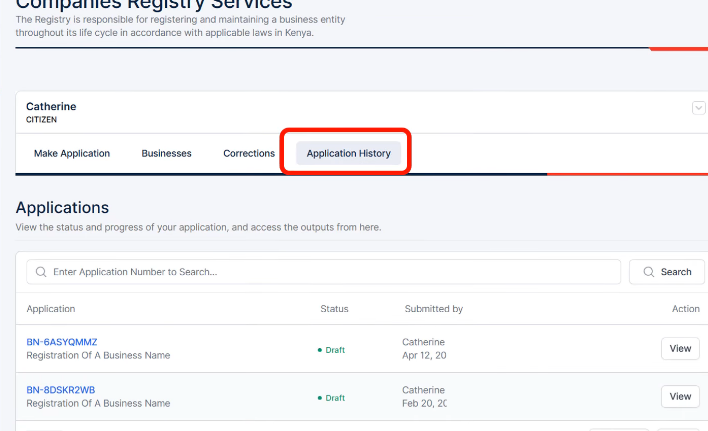
Step 11: Submit, Pay, and Track Your Application
If everything is correct, submit the application. The registration fee (about KES 950) can be paid via M-Pesa, card, or online banking. After payment, your application moves to the review stage.
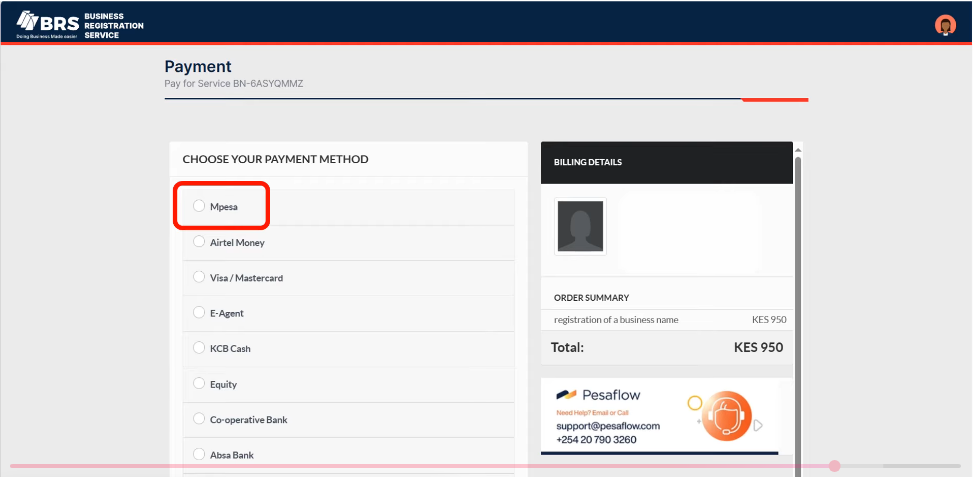
You can track progress on the BRS dashboard under Application History, with statuses such as Draft, Submitted, Under Review, Approved, or Correction Required. Once approved, you will receive a notification via your eCitizen account.
How to Register a Business Name in Kenya (BRS Portal)
- Step 1: Sign in to eCitizen
- Step 2: Access Business Registration Services (BRS)
- Step 3: Confirm Login
- Step 4: Start Business Name Registration
- Step 5: Enter Proposed Business Names
- Step 6: Enter Applicant Information
- Step 7: Select Business Activity
- Step 8: Enter Registered Office Address]
- Step 9: Add Proprietor Information
- Step 10: Download and Sign BN2 Form
- Step 11: Submit, Pay, and Track Application

Related: Apply and Print Birth Certificate in Minutes
Frequently Asked Questions
Is a passport-size photo required when registering a business name?
Yes, you must upload a recent passport-size photograph during registration.
How many business names do I need to provide?
You must submit at least 3 proposed business names, with your preferred option listed first.
What identification documents are required?
You need a Kenyan national ID or passport, depending on your citizenship status.
How much will it cost to register a business name?
The registration fee is approximately Ksh. 950 (government fees may change over time).