
How to File returns with a P9 form (Step by Step)
In this post I will show you simple steps How to File returns with a P9 form. If you were employed during the year and earned a salary, select ITR for Employment Income Only when filing your return. Do not file a Nil Return if you received employment income. If you need help with this just contact me or send a WhatsApp message.
What you need when Filing Returns with a P9 form
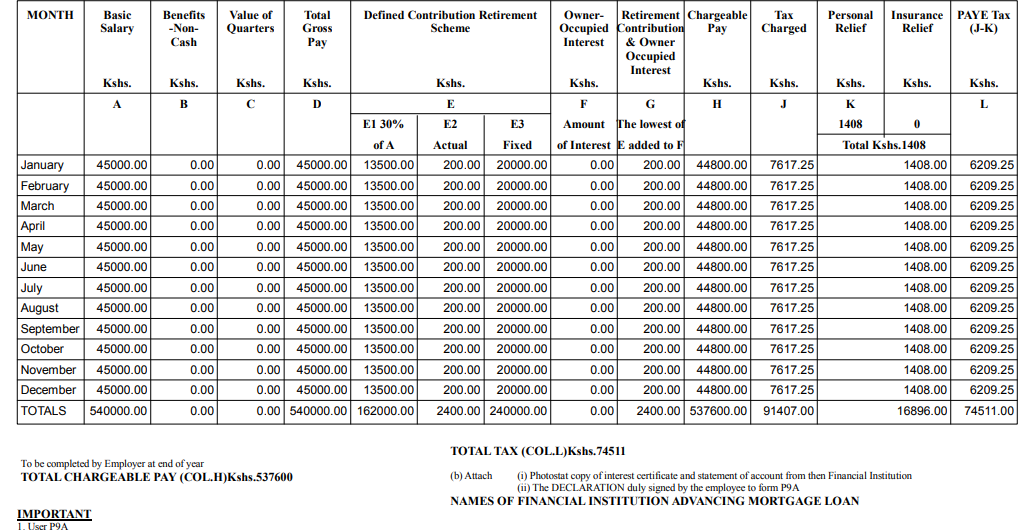
If you are employed or filing returns for an employed person, you will use an employer issued P9 Form. Other must have requirements include: KRA PIN/ ID Number, iTax Password and KRA P9 Form. The P9 Form show your Gross Pay, Taxable Income, PAYE and Personal Relief for the whole year.
Filing KRA Employment Returns With a P9 Form
A P9 form contains a summary of your annual employment income, PAYE deductions, and tax reliefs. It is one of the most important documents used when filing employment income tax returns on the KRA iTax portal.
By comparing the information on your P9 form with the details displayed on iTax, you can ensure your return is accurate and avoid penalties for incorrect filing.
Follow the step-by-step guide below to successfully file your KRA employment returns using a P9 form.
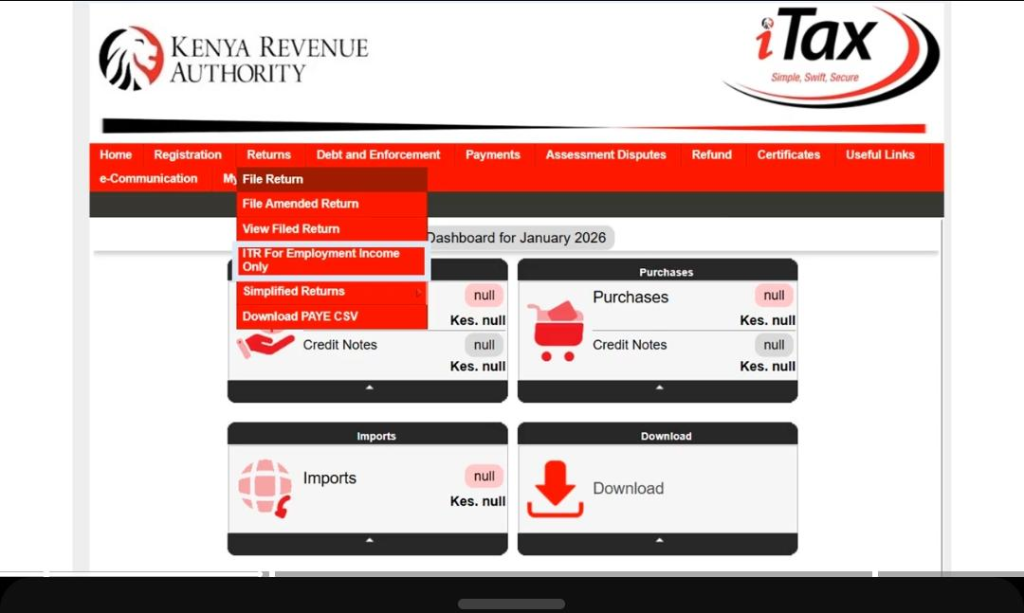
Step 1: If you’re employed and have a P9 form, or even if you don’t have one, this is how you file your employment income tax returns. Open Google Chrome or any other browser and search for iTax.
If you do not know your KRA PIN, you can retrieve it using your National ID number. At the top of the login page, select ID Number instead of PIN. Enter your National ID number and click Validate.
Your KRA PIN will automatically appear. If you do not know your iTax password, you will need access to the email address that was used to register your KRA PIN. If you no longer have access to that email address, contact KRA through their official support channels to update your email address before proceeding.
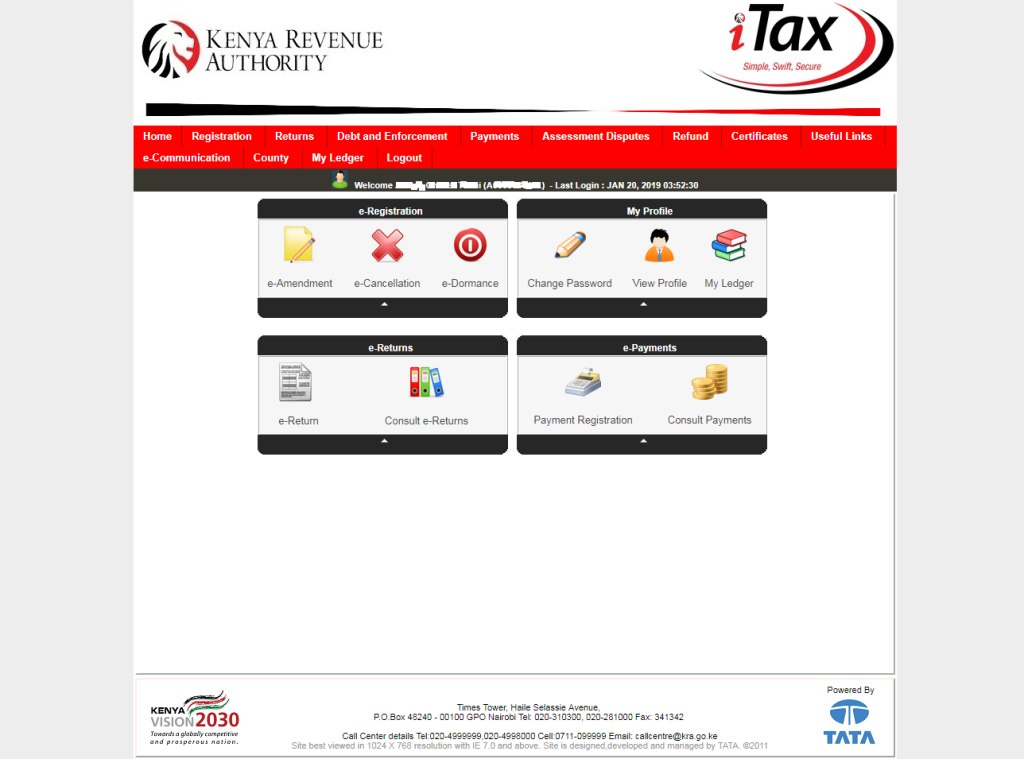
Step 2: Click Login and enter your KRA PIN. If you do not know your PIN, use your National ID number to retrieve it first as explained in Step 1. Enter your password and answer the security stamp (the mathematical question), then click Login.
Choose the return period (the year you are filing for) and click Next. In most cases, this will be the previous tax year. If you have not filed returns for several years, you may need to file for each outstanding year separately.
Review your personal details, which are automatically filled in by the system. Confirm that the information is correct and click Next. You may be asked employment-related questions, such as whether you received benefits like housing, a company car, or other employment benefits. Answer these questions according to your situation and click Next.
If you answer Yes to any of these questions, the system may require additional information before allowing you to proceed. If prompted, enter or confirm your bank details and click Next. In some cases, bank details are mandatory, while in others you may be able to proceed without entering them.
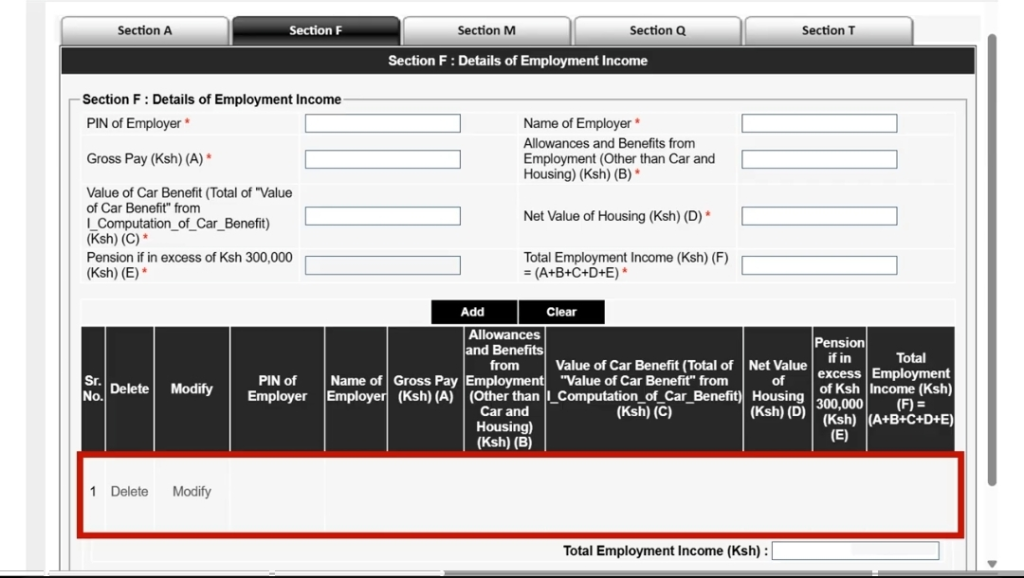
Step 3: The next section is Section F – Details of Employment Income.
This section contains information about your employer, including their PIN and other employment details. In many cases, this information is automatically populated from records submitted to KRA by your employer.
Check that all the information matches your P9 form. If you have a P9 form, compare the figures and confirm that they are correct.
If you do not have a P9 form, review the employment income details available on the system and confirm that they match your payslips or employer records.
If any information is incorrect, you can enter the correct figures manually in Section F. If everything is correct according to your P9 form or employment records, simply click Next. You do not need to fill in anything else.
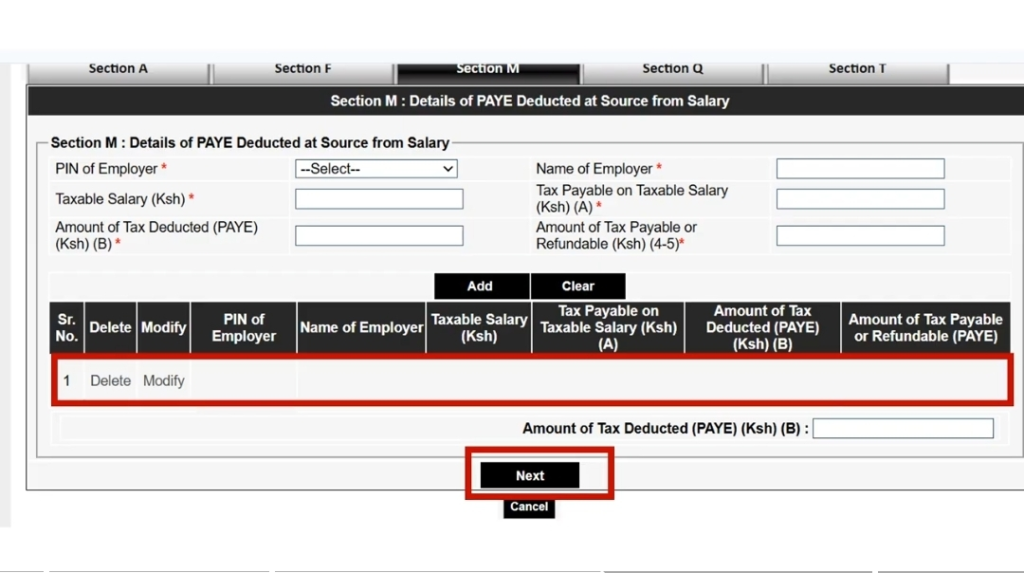
Step 4: The next section is Section M – Details of PAYE Deducted from Salary.
This section shows details of the PAYE tax deducted from your salary. Review the information carefully and compare it with your P9 form or payslips. If the information is correct, click Next.
If there are any discrepancies, enter the correct figures manually in the Section M fields. Once you are done, click Next.
This section confirms how much tax has already been deducted and remitted to KRA by your employer during the year.
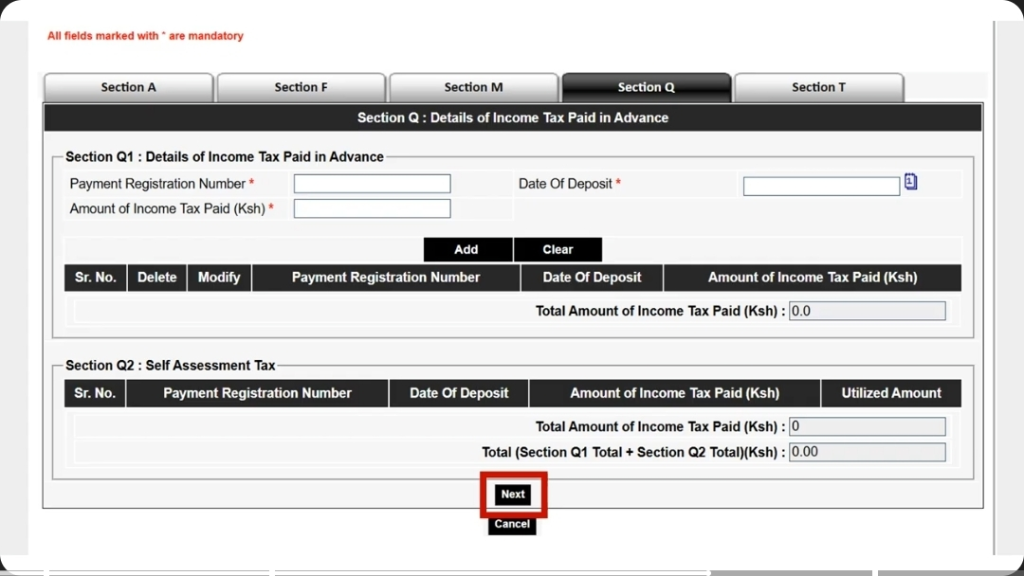
Step 5: The next section is Section Q – Details of Income Tax Paid in Advance.
If you have paid any income tax in advance, enter the payment registration number, deposit date, and the amount paid so it can be considered during tax computation.
The purpose of filing returns is to inform KRA how much income you earned and how much tax you paid during the year.
If you do not have any information to enter in this section, simply click Next. If you have details to add, enter them and then click Next.
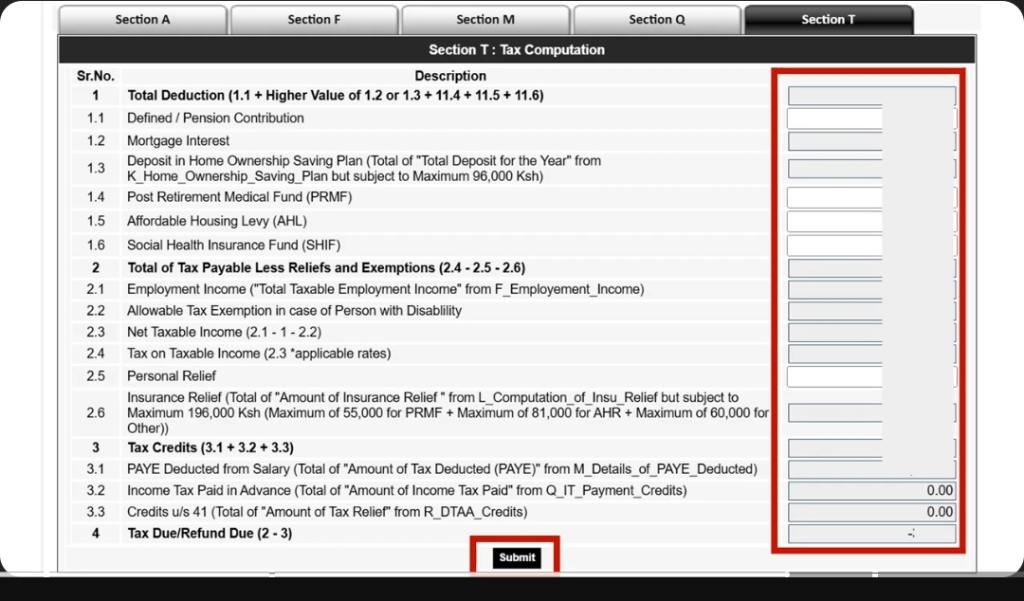
Step 6: Finally, you will reach Section T – Tax Computation.
This section combines all the information entered in the previous sections and calculates whether you owe KRA any tax or whether KRA owes you a refund.
Review the figures carefully and confirm that they match your calculations and your P9 form. If everything is correct, click Submit. At the end, you will see the Tax Due/Refund amount.
- If the amount is negative, you are eligible for a tax refund from KRA.
- If the amount is positive, you owe KRA additional tax and should generate a payment slip before paying via M-Pesa or another approved payment method.
KRA will ask you to confirm whether you want to submit the return. If you are satisfied that all the information is accurate, click OK. If you need to make changes, click Cancel.
Remember that providing false information in your tax return may attract penalties and interest charges. Always ensure that the information you submit is accurate.
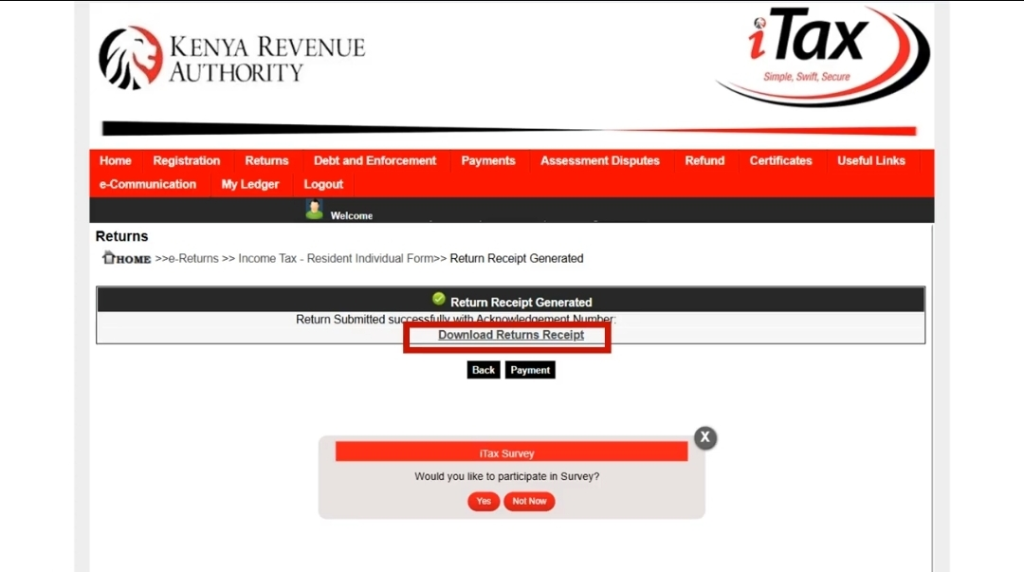
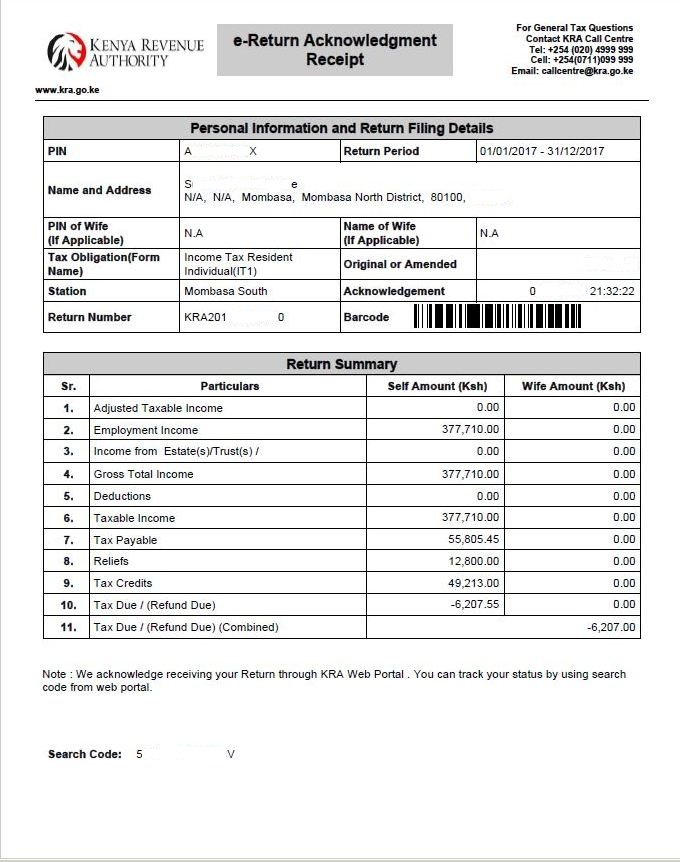
Step 7: Once the return is successfully submitted, a Return Receipt will be generated. Download and save it for your records. A copy will also be sent to your email address.
If the tax computation shows that you owe KRA additional tax, you can proceed to make payment using M-Pesa or any other payment method provided by KRA. Save your return receipt and email copy for future reference.
Congratulations! Your employment income tax return has now been successfully filed. Keep your return receipt safely for future reference, as it may be required when applying for loans, tenders, visas, tax compliance certificates, or other official processes.
Where Can you Get a P9 Form?
Your P9 form is issued by your employer at the end of each tax year. You can obtain it from your employer’s Human Resources (HR), Payroll, or Accounts department.
Some employers provide P9 forms as printed documents, while others send them by email or make them available through employee self-service portals.
If you have not received your P9 form, contact your employer and request a copy before filing your KRA employment income tax return. If you no longer work for the employer, you can still request your P9 form from their HR or payroll department.
Frequently Asked Questions
What is a P9 Form?
A P9 form is a document issued by employers in Kenya that summarizes your annual earnings, PAYE deductions, and tax reliefs. It is used when filing KRA income tax returns on iTax.